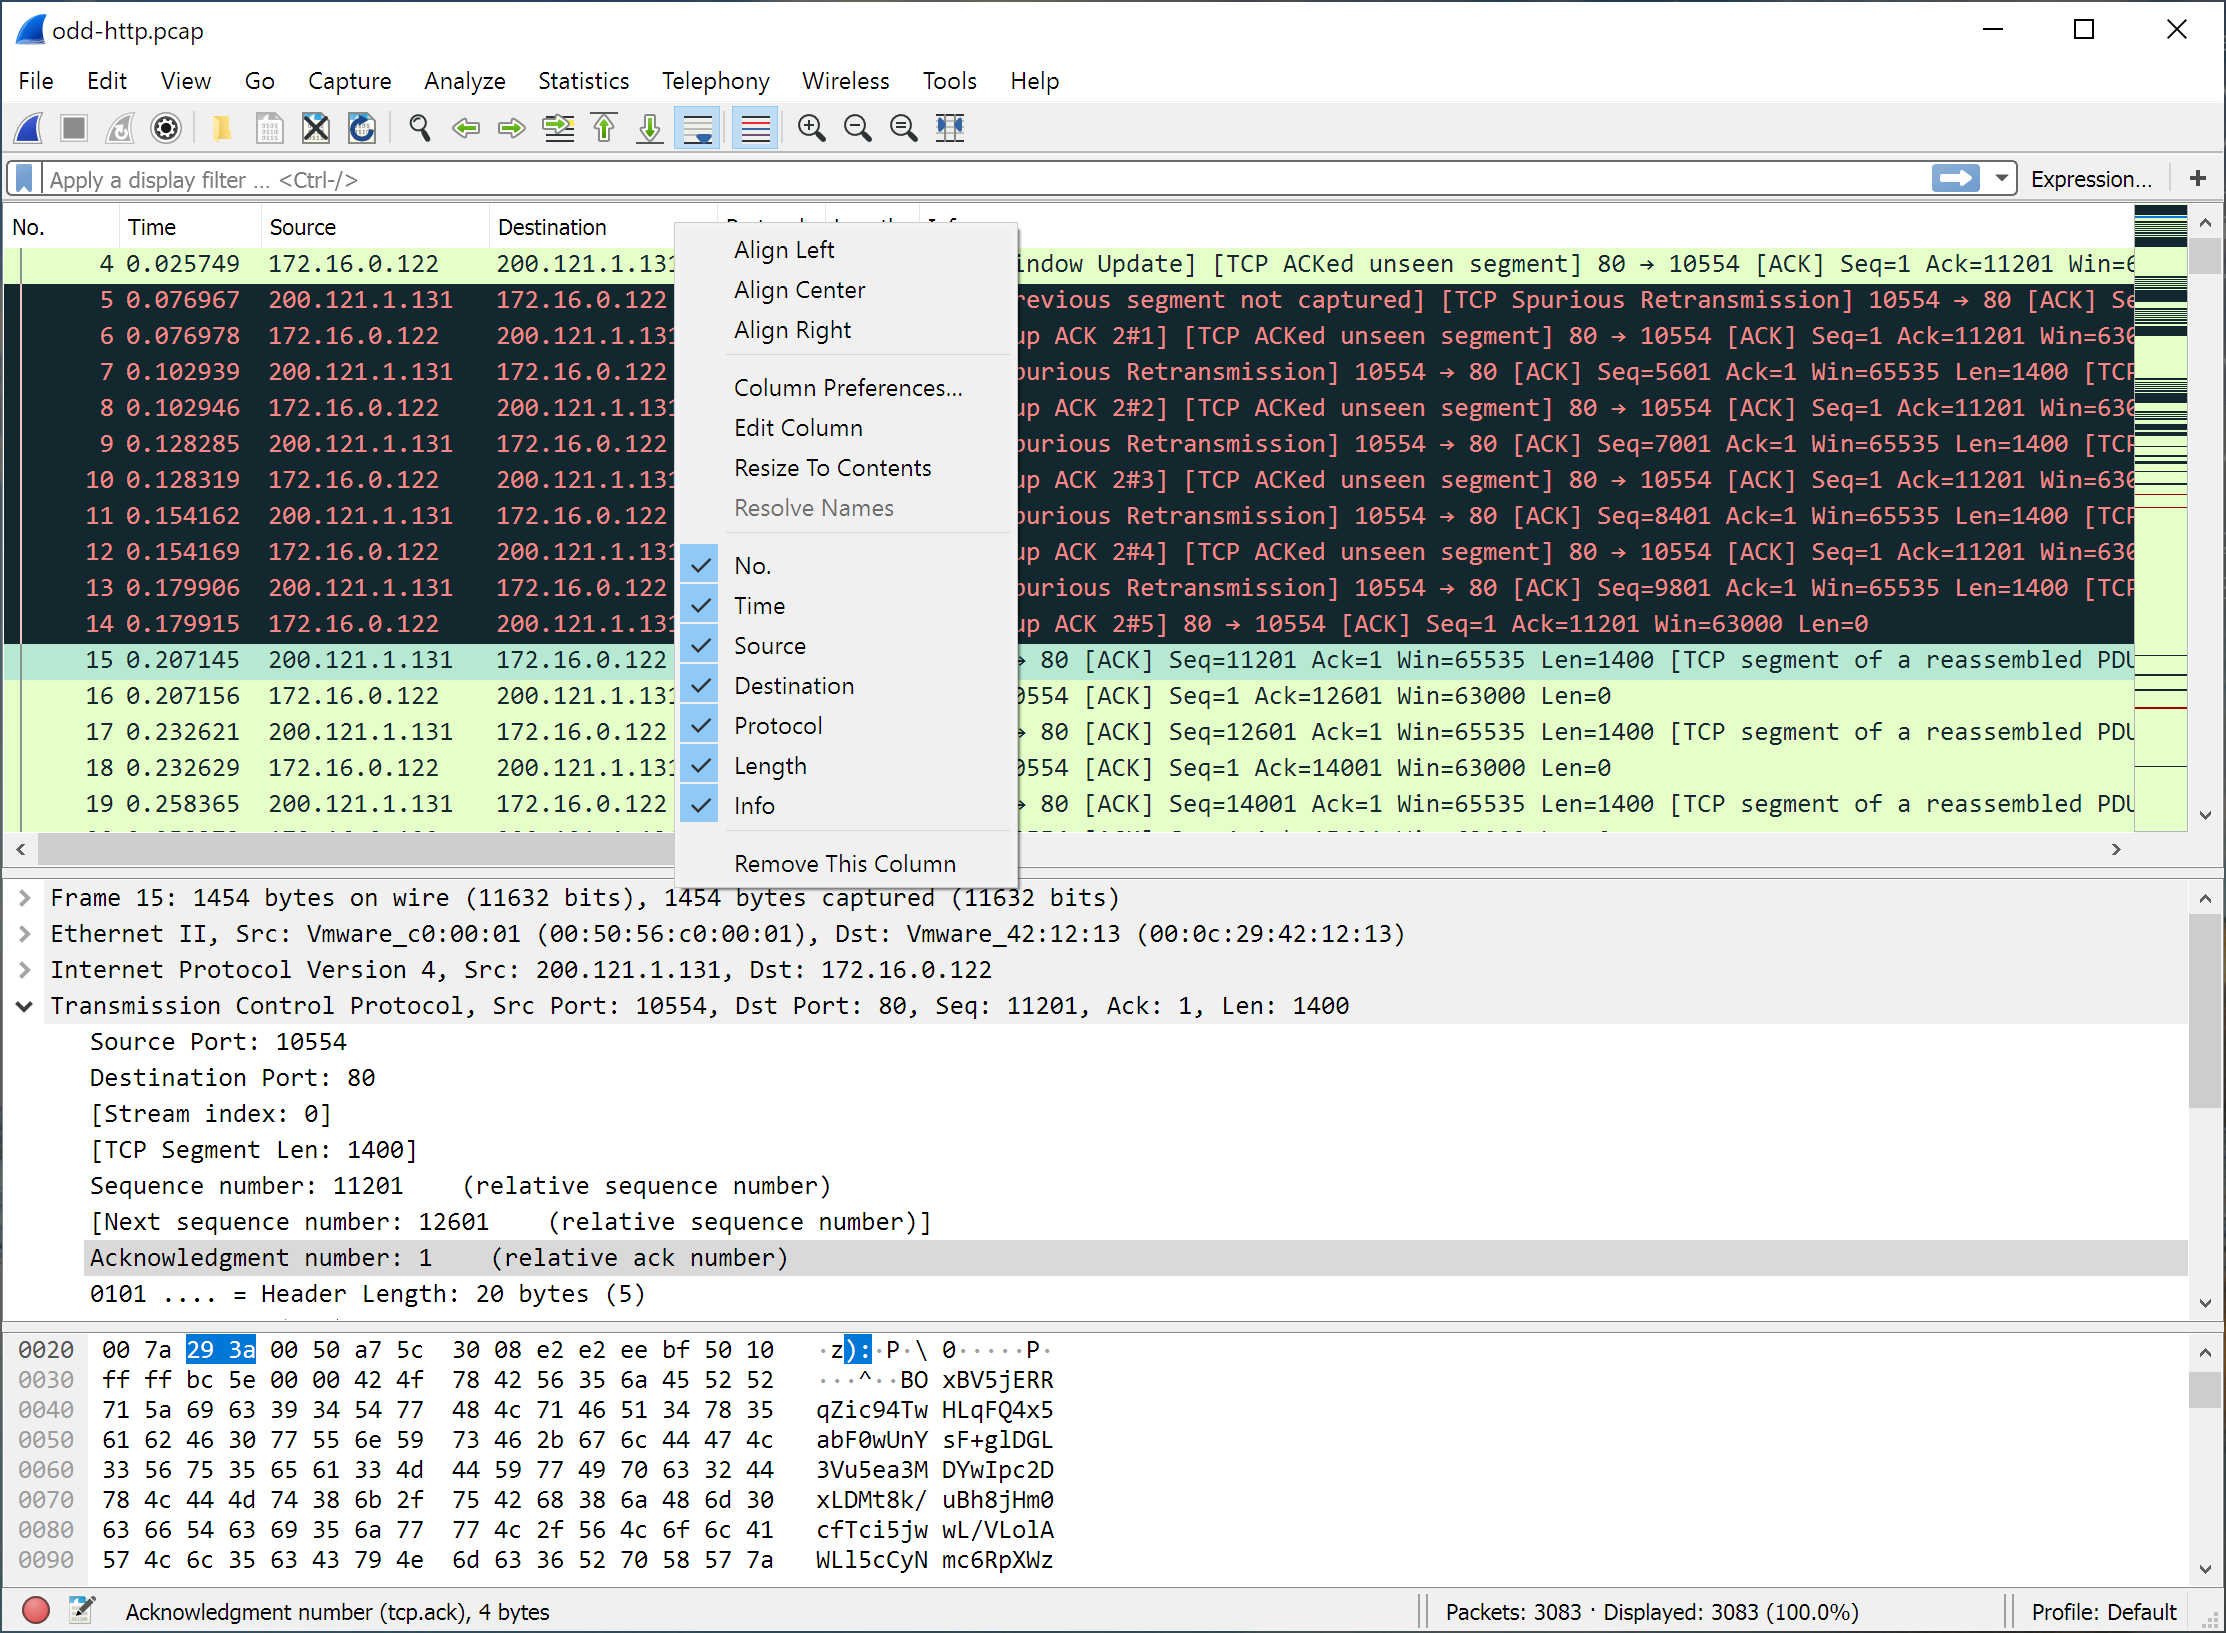
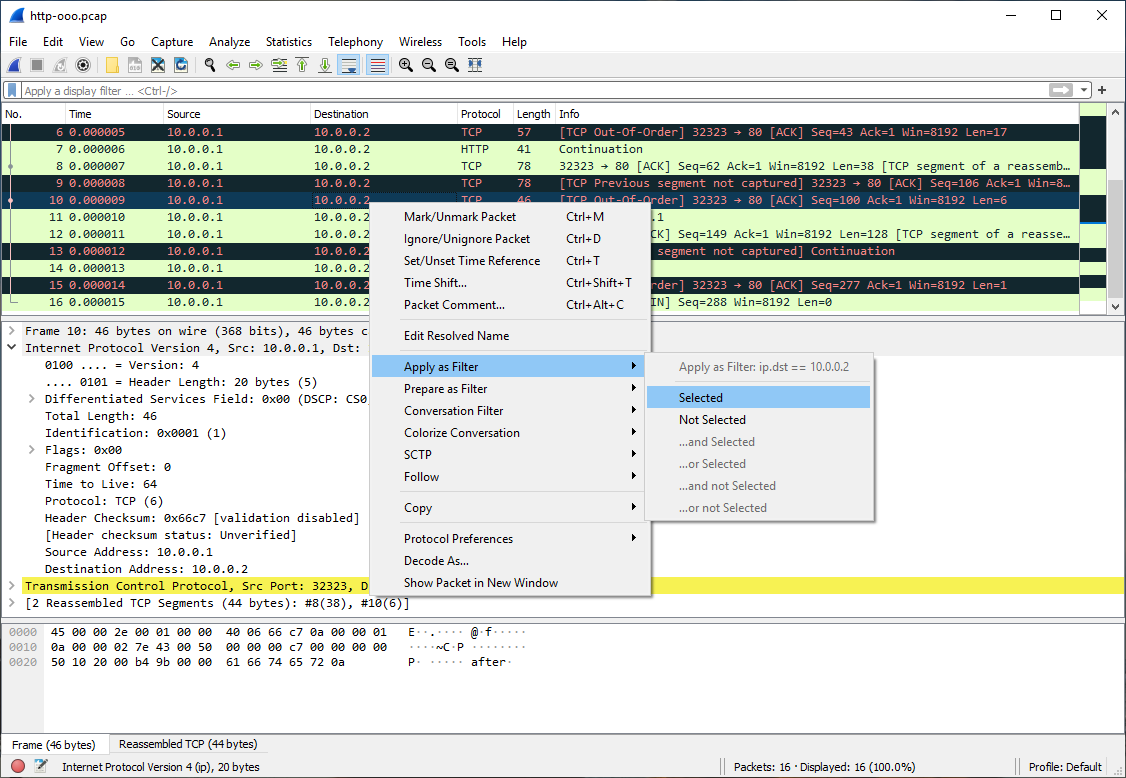
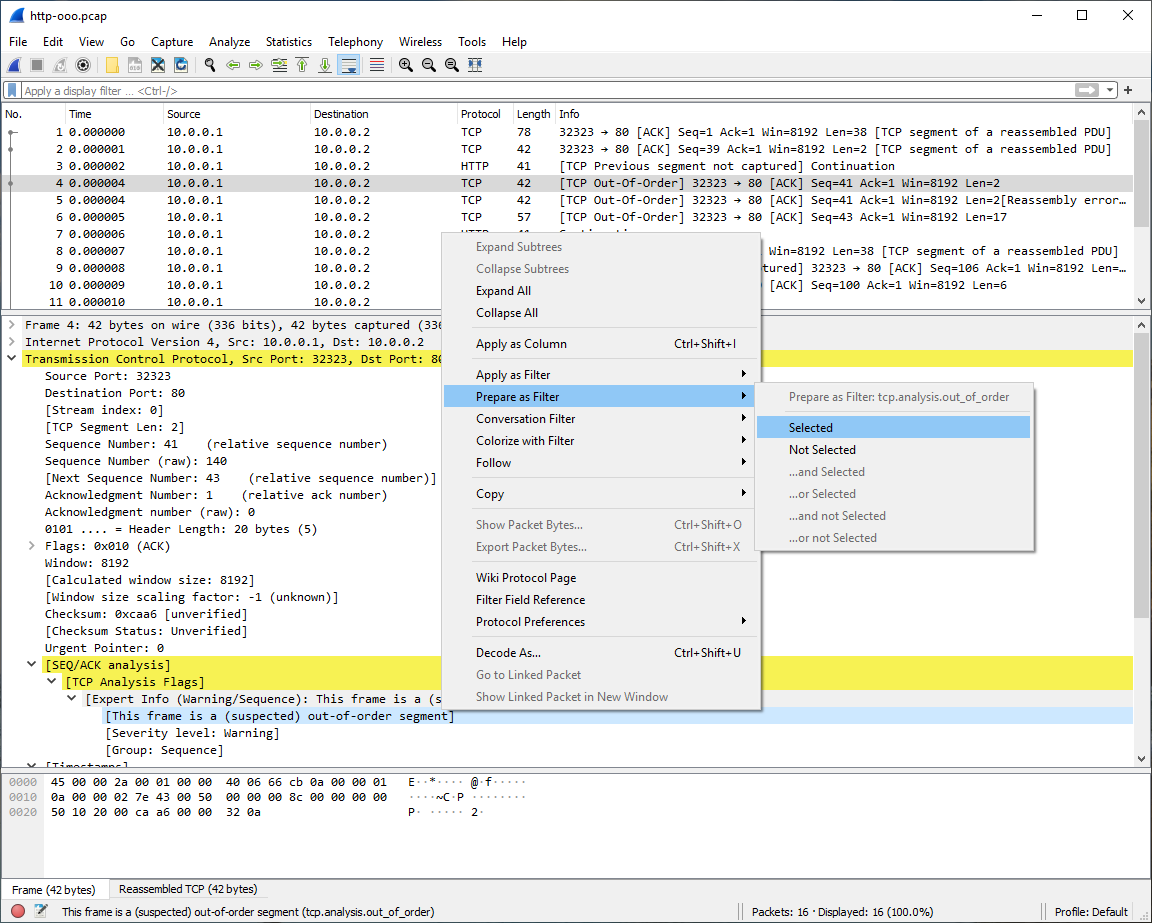
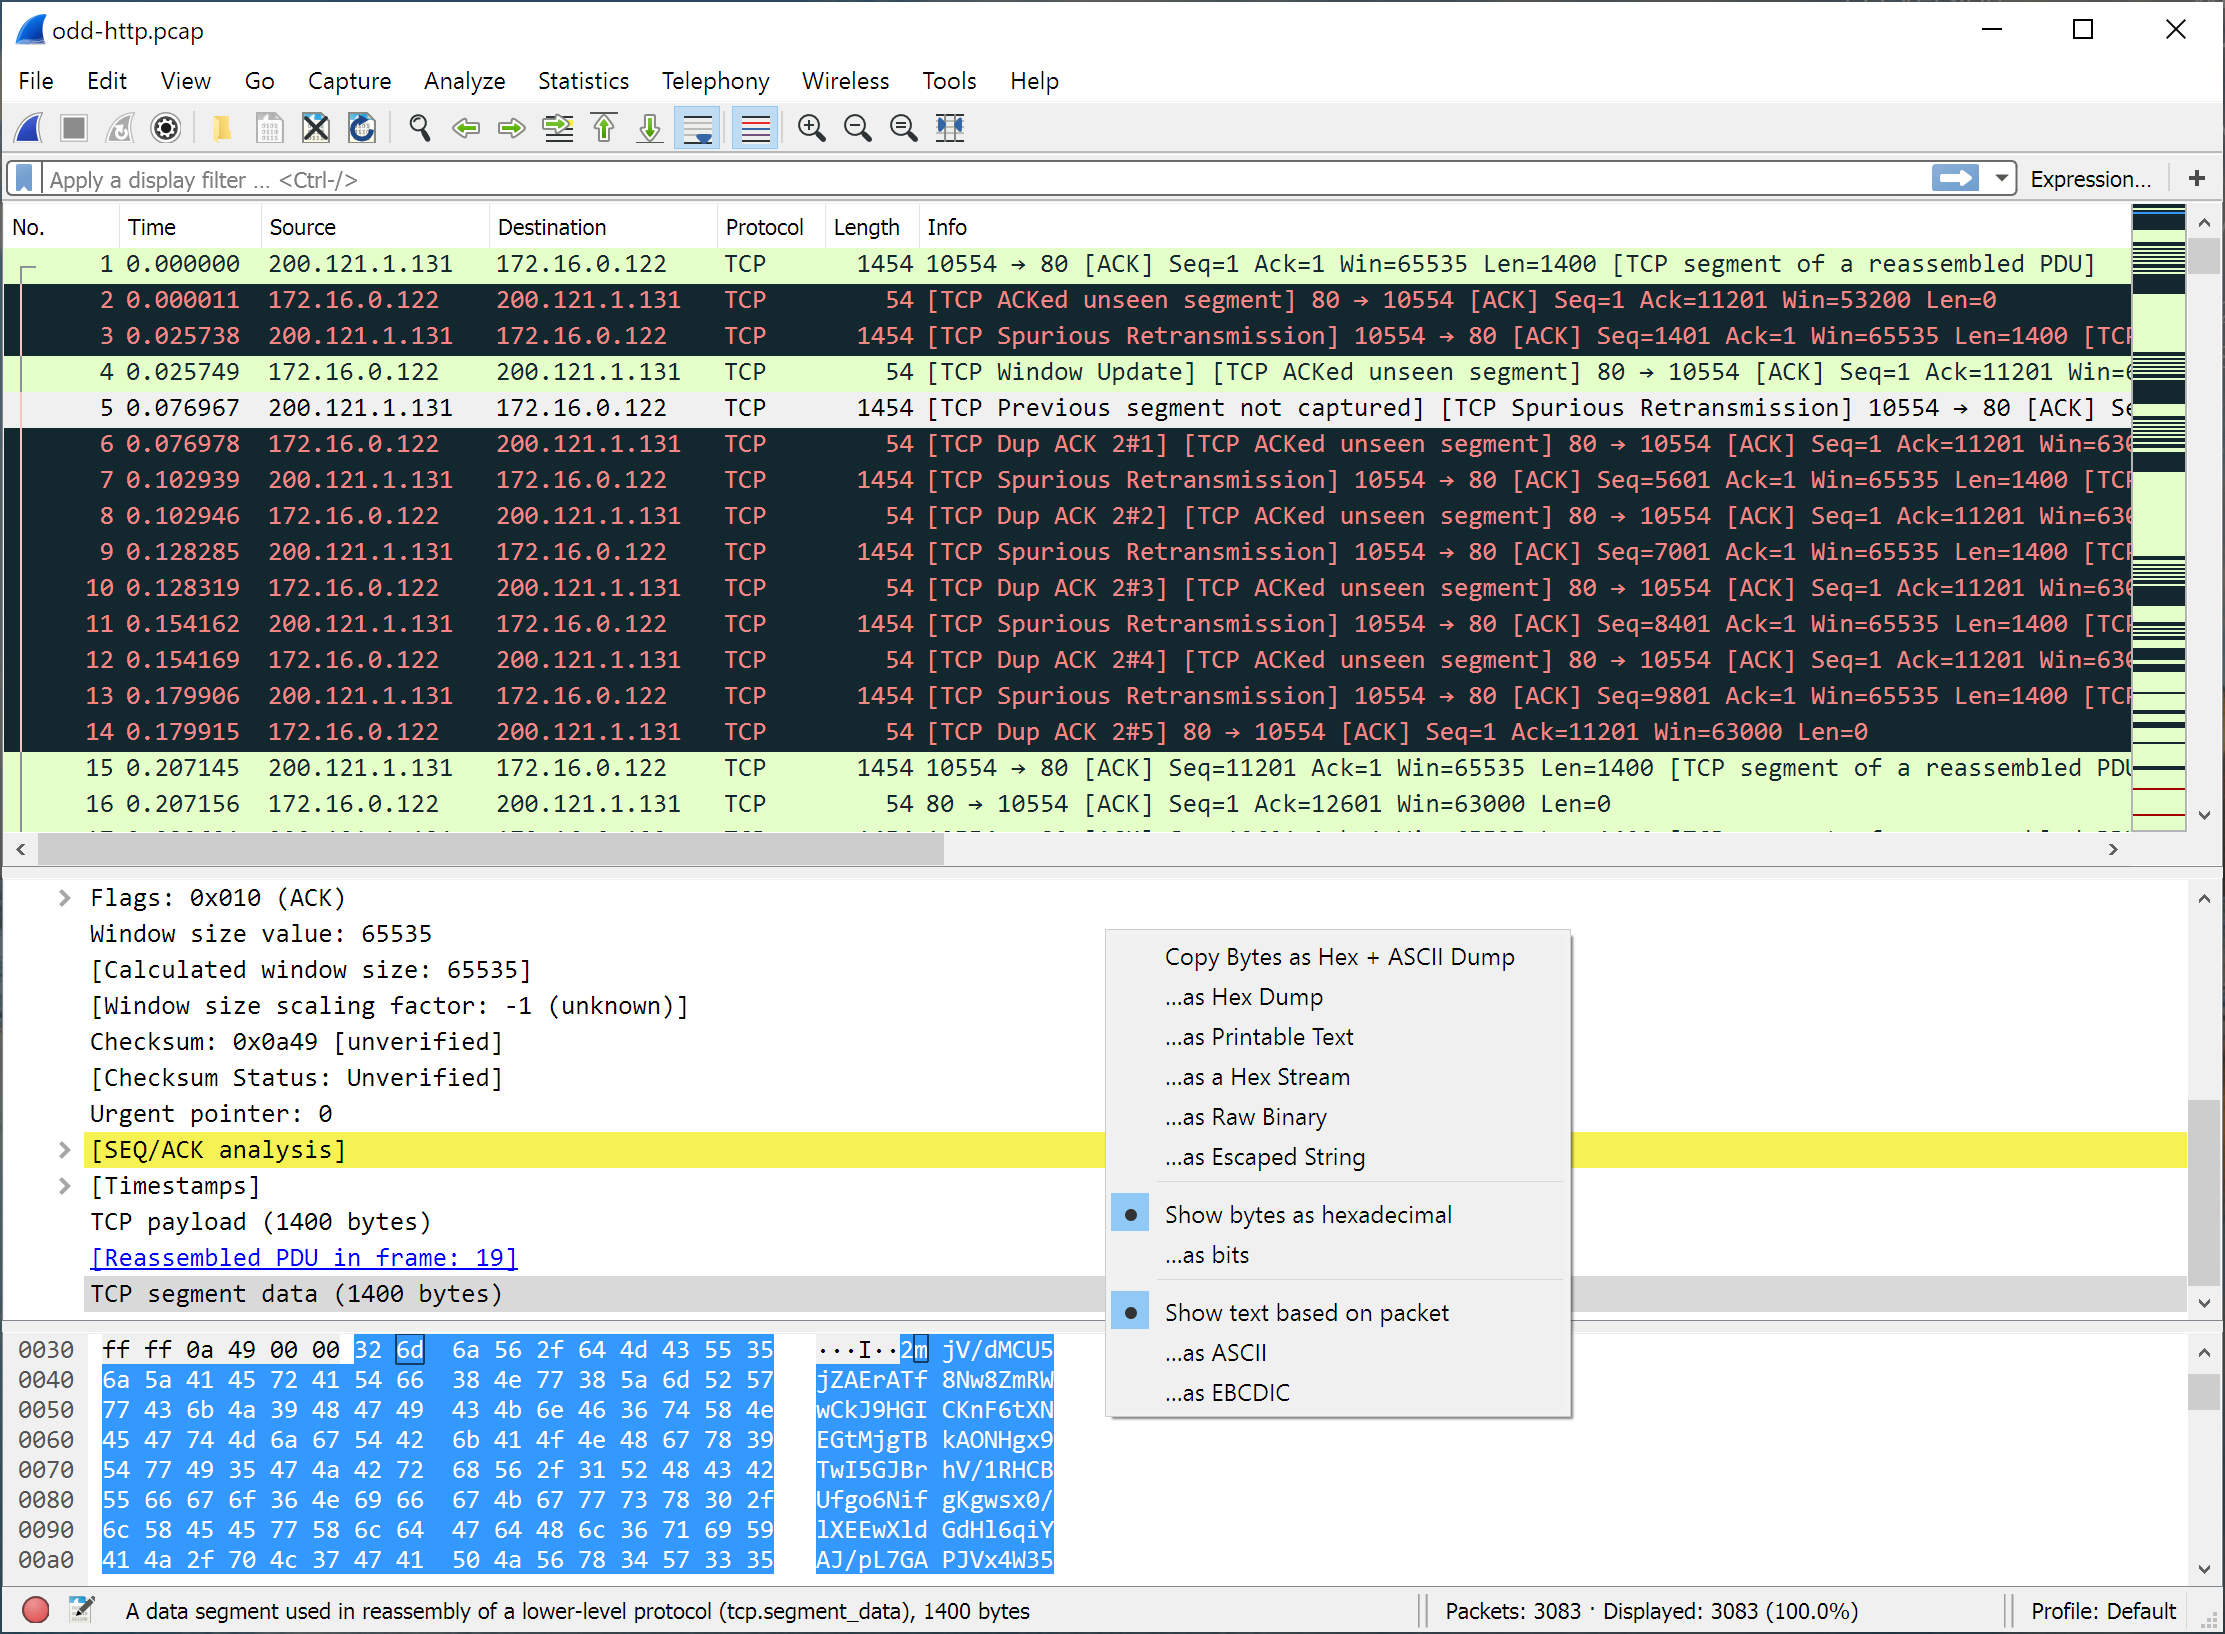
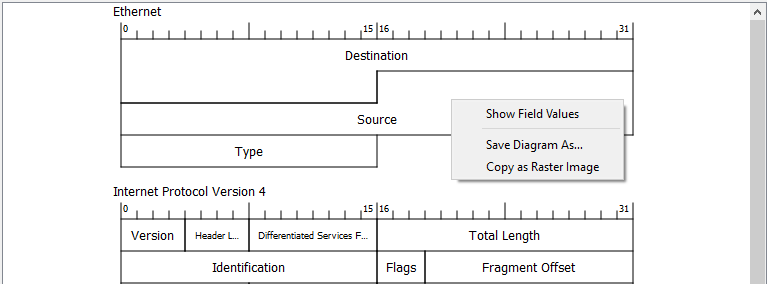
You can open a pop-up menu over the “Packet List”, its column heading, “Packet Details”, or “Packet Bytes” by clicking your right mouse button on the corresponding item.
The following table gives an overview of which functions are available in this header, where to find the corresponding function in the main menu, and a description of each item.
Table 6.1. The menu items of the “Packet List” column header pop-up menu
| Item | Description |
|---|---|
Left-align values in this column. | |
Center-align values in this column. | |
Right-align values in this column. | |
Open the “Preferences” dialog for this column. | |
Open the column editor toolbar for this column. | |
Resize the column to fit its values. | |
Display the raw values for fields. | |
Display human-readable strings instead of raw values for fields. Only applicable to custom columns with fields that have value strings and custom columns which can be resolved to strings. | |
Display the values using the same format as in Packet Details. Only applicable to custom columns. | |
No., Time, Source, et al. | Show or hide a column by selecting its item. |
Remove this column, similar to deleting it in the “Preferences” dialog. |
The following table gives an overview of which functions are available in this pane, where to find the corresponding function in the main menu, and a short description of each item.
Table 6.2. The menu items of the “Packet List” pop-up menu
| Item | Corresponding main menu item | Description |
|---|---|---|
Mark or unmark a packet. | ||
Ignore or inspect this packet while dissecting the capture file. | ||
Set or reset a time reference. | ||
Opens the “Time Shift” dialog, which allows you to adjust the timestamps of some or all packets. | ||
Opens the “Packet Comment” dialog, which lets you add a comment to a single packet. Note that the ability to save packet comments depends on your file format. E.g., pcapng supports comments, pcap does not. | ||
Allows you to enter a name to resolve for the selected address. | ||
Immediately replace or append the current display filter based on the most recent packet list or packet details item selected. The first submenu item shows the filter and subsequent items show the different ways that the filter can be applied. | ||
Change the current display filter based on the most recent packet list or packet details item selected, but don’t apply it. The first submenu item shows the filter and subsequent items show the different ways that the filter can be changed. | ||
Apply a display filter with the address information from the selected packet. For example, the IP menu entry will set a filter to show the traffic between the two IP addresses of the current packet. | ||
Create a new colorizing rule based on address information from the selected packet. | ||
Allows you to analyze and prepare a filter for this SCTP association. See Section 9.13, “SCTP Windows”. | ||
Opens a sub-menu with options of various types of protocol streams to follow. The entries for protocols which aren’t found in the currently selected packet will not be shown. See Section 7.2, “Following Protocol Streams”. | ||
→ | Copy the summary fields as displayed to the clipboard as tab-separated text. | |
→ | Copy the summary fields as displayed to the clipboard as comma-separated text. | |
→ | Copy the summary fields as displayed to the clipboard as YAML data. | |
→ | Prepare a display filter based on the currently selected item and copy that filter to the clipboard. | |
→ | Copy the packet bytes to the clipboard in full “hexdump” format. | |
→ | Copy the packet bytes to the clipboard in “hexdump” format without the ASCII portion. | |
→ | Copy the packet bytes to the clipboard as ASCII text, excluding non-printable characters. | |
→ | Copy the packet bytes to the clipboard as an unpunctuated list of hex digits. | |
→ | Copy the packet bytes to the clipboard as raw binary. The data is stored in the clipboard using the MIME type “application/octet-stream”. | |
Adjust the preferences for the selected protocol, or disable it entirely. (You can re-enable it with the “Enabled Protocols” dialog box.) | ||
Change or apply a new relation between two dissectors. | ||
Shows the selected packet in a separate window. The separate window shows only the packet details and bytes. See Figure 6.2, “Viewing a packet in a separate window” for details. |
The following table gives an overview of which functions are available in this pane, where to find the corresponding function in the main menu, and a short description of each item.
Table 6.3. The menu items of the “Packet Details” pop-up menu
| Item | Corresponding main menu item | Description |
|---|---|---|
Expand the currently selected subtree. | ||
Collapse the currently selected subtree. | ||
Expand all subtrees in all packets in the capture. | ||
Wireshark keeps a list of all the protocol subtrees that are expanded, and uses it to ensure that the correct subtrees are expanded when you display a packet. This menu item collapses the tree view of all packets in the capture list. | ||
Allows you to enter a name to resolve for the selected address. | ||
Use the selected protocol item to create a new column in the packet list. | ||
Immediately replace or append the current display filter based on the most recent packet list or packet details item selected. The first submenu item shows the filter and subsequent items show the different ways that the filter can be applied. | ||
Change the current display filter based on the most recent packet list or packet details item selected, but don’t apply it. The first submenu item shows the filter and subsequent items show the different ways that the filter can be changed. | ||
This menu item uses a display filter with the information from the selected protocol item to build a new colorizing rule. | ||
Opens a sub-menu with options of various types of protocol streams to follow. The entries for protocols which aren’t found in the currently selected packet will not be shown. See Section 7.2, “Following Protocol Streams”. | ||
→ | Copy the packet details as displayed. | |
→ | Copy the selected packet detail and its children as displayed. | |
→ | Copy the displayed text of the selected field to the system clipboard. | |
→ | Copy the name of the selected field to the system clipboard. | |
→ | Copy the value of the selected field to the system clipboard. | |
→ | Prepare a display filter based on the currently selected item and copy it to the clipboard. | |
→ | Copy the packet bytes to the clipboard in full “hexdump” format. | |
→ | Copy the packet bytes to the clipboard in “hexdump” format without the ASCII portion. | |
→ | Copy the packet bytes to the clipboard as ASCII text, excluding non-printable characters. | |
→ | Copy the packet bytes to the clipboard as an unpunctuated list of hex digits. | |
→ | Copy the packet bytes to the clipboard as raw binary. The data is stored in the clipboard using the MIME type “application/octet-stream”. | |
→ | Copy the packet bytes to the clipboard as C-style escape sequences. | |
This menu item is the same as the File menu item of the same name. It allows you to export raw packet bytes to a binary file. | ||
Open the wiki page for the selected protocol in your web browser. | ||
Open the filter field reference web page for the selected protocol in your web browser. | ||
Adjust the preferences for the selected protocol, or disable it entirely. (You can re-enable it with the “Enabled Protocols” dialog box.) | ||
Change or apply a new relation between two dissectors. | ||
If the selected field has a corresponding packet such as the matching request for a DNS response, go to it. | ||
If the selected field has a corresponding packet such as the matching request for a DNS response, show the selected packet in a separate window. See Figure 6.2, “Viewing a packet in a separate window” for details. |
The following table gives an overview of which functions are available in this pane along with a short description of each item.
Table 6.4. The menu items of the “Packet Bytes” pop-up menu
| Item | Description |
|---|---|
Copy the packet bytes to the clipboard in full “hexdump” format. | |
Copy the packet bytes to the clipboard in “hexdump” format without the ASCII portion. | |
Copy the packet bytes to the clipboard as ASCII text, excluding non-printable characters. | |
Copy the packet bytes to the clipboard as an unpunctuated list of hex digits. | |
Copy the packet bytes to the clipboard as raw binary. The data is stored in the clipboard using the MIME type “application/octet-stream”. | |
Copy the packet bytes to the clipboard as C-style escape sequences. | |
Display the byte data as hexadecimal digits. | |
Display the byte data as binary digits. | |
Show the “hexdump” data with text. | |
Use ASCII encoding when displaying “hexdump” text. | |
Use EBCDIC encoding when displaying “hexdump” text. |
The following table gives an overview of which functions are available in this pane along with a short description of each item.
Table 6.5. The menu items of the “Packet Diagram” pop-up menu
| Item | Description |
|---|---|
Display current value for each field on the packet diagram. | |
Save the packet diagram to an image file (PNG, BMP, JPEG). | |
Copy the packet diagram to the clipboard in raster (ARGB32) format. |
